| Chapter V. WSN430 connections | ||
|---|---|---|
 | ||
Table of Contents
In order to compile and flash your code into the MSP430 microcontroller of the WSN430 node you need a simple hardware set up.
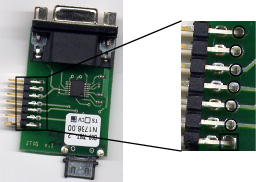
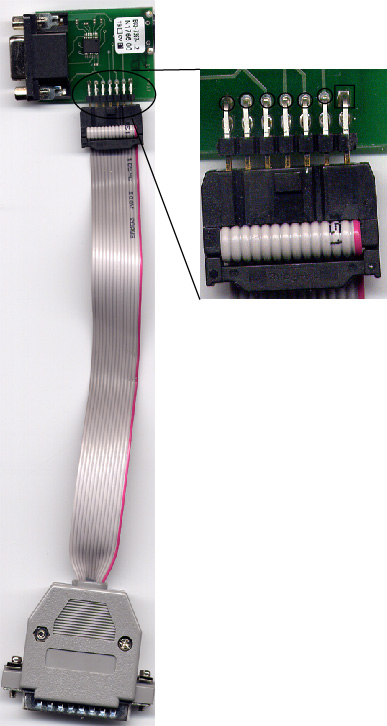
Connect correctly the JTAG cable to the JTAG/SERIAL board (See Figure V.2, “Connecting the JTAG cable to the JTAG serial board.”). The colored wired of the cable (red on the picture) corresponds to the wire 0 and MUST be connected to the PIN 0 pf the JTAG/SERIAL board. The pin 0 of the board could be differentiated since its base is rectangular and not circular as it is depicted in Figure V.1, “JTAG serial board” and in Figure V.2, “Connecting the JTAG cable to the JTAG serial board.”
Connect the 2x10 pin connector of the JTAG/SERIAL board (See Figure II.4, “JTAG multi connector”) into the WSN430 node as in the Figure V.3, “Connecting the JTAG serial board to the WSN430 node.”
Connect the the parallel plug to your PC's parallel port. If your installation is set up to use a local printer, you need to remove the printer and disable the printer daemon before you can use the port for JTAG.

Figure V.1. JTAG serial board

Figure V.2. Connecting the JTAG cable to the JTAG serial board.
![[Note]](admon/note.png) | |
The JTAG can power supply the WSN430 node. However, the amount of current the JTAG can source to WSN430 node is limited (No more than 2-3 mA). It takes power from the parallel port, so it's quite limited, but it is of course enough for the WSN430 node. |
![[Warning]](admon/warning.png) | Reverse JTAG connection |
|---|---|
Reversing the polarity of the JTAG is strictly prohibited. A wrong polarity will severely damage the WSN340 unit |